Publishing a quote
PERMISSIONS Security level with access to CRM and object permissions to edit all for Opportunities and Quotes, or edit "Mine" if the user is the owner of the opportunity associated with the quote.
NAVIGATION My> CRM > Quotes > open a quote > click Publish Quote or, if the quote has been published before, Re-Publish Quote
To publish a quote, do the following:
- To open the page, use the path(s) in the Security and navigation section above.
- Click Publish Quote or, if the quote has been published before, Re-Publish Quote, and select a publishing option.
NOTE To modify the email message sent with the quote, navigate to Left Navigation Menu > CRM > Tools/Setup > Quote Email Messages. Refer to Adding or editing email message templates for invoices or quotes.
| Publishing Option | Description |
|---|---|
|
Publish |
The Publish page opens. The fields on this page are populated and the quote email message template is assigned using the settings from the Quote Settings page of the organization receiving the quote. The settings must be configured before you generate the quote preview. Refer to The Quote Settings tab and page. If no settings were selected, the system defaults are applied. |
|
Publish Manually |
This option opens your mail client to an email message generated using the system default quote email message, and includes a link to a page where the customer can view the quote. |
|
Publish Manually and Request Approval |
This option opens your mail client to an email message generated using a different email message template, and the link opens an external approval URL where the customer can approve or decline the quote. The quote contact's email address will populate the To: field, and your own email address will populate the CC: field. |
- If you selected Publish, the Publish page will open. Review and edit the following fields:
| Field Name | Description |
|---|---|
|
Content |
|
| Email Subject |
This field appears on email notification templates and the Quote > Publish page. It populates the Subject line of notification emails that are based on those templates. The field can contain text, variables, or both, and can be edited. It is always required. |
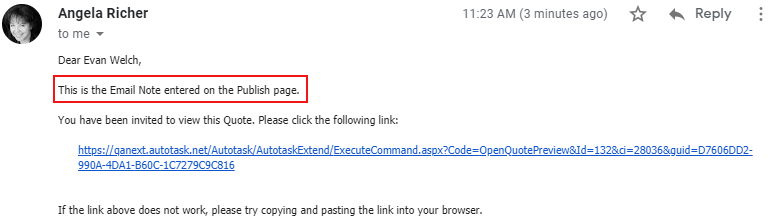
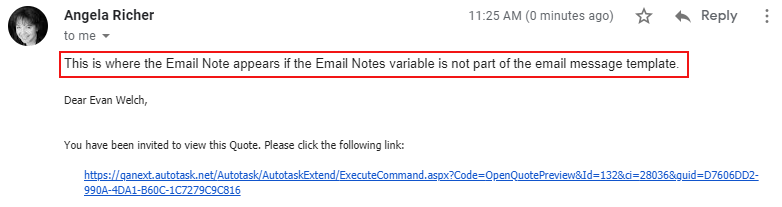
| Email Notes |
This field appears on the Quote Settings and Quote > Publish pages. It lets you add personalized comments or additional organization-specific information to a quote email message when you are using an email message template. The content of the Email Notes field also provides the content for the [Quote: Email Notes] variable.
|
|
Notification |
|
| Notify |
This header or section appears everywhere a notification email can be sent from Autotask, as well as the Default Settings dialog box for entities that support them. It is followed by a checklist of role-based recipients that can be selected to receive the email. In the actual email, the contacts or resources in these roles will replace the role names. Refer to Role-based notification recipients. On the entities (but not on the default settings), you can add named contacts and resources to the list of recipients and add external email addresses to the Other Email(s) fields. Customer contacts are added to the email To: field, whereas internal resources are added to the BCC: field. For the notification email to be sent, you must select or enter at least one recipient in the To:, CC:, BCC:, or Other Email(s) fields. |
|
Email Message |
This field appears on pages where an email message template can be selected. The email message template determines the body of the email the quote or invoice will be attached or linked to. The default setting is Use Default Organization Email Message Template. Refer to The Invoice settings tab and page and The Quote Settings tab and page. You may select any active email message template. The selection you make here will override any setting at the system, country, or organization level. |
|
Contacts (Notify via To) |
These selection controls let you add named Autotask contacts and resources to the recipients of the notification email. |
| Other Emails, Other Emails to CC, Other Emails to BCC |
This field appears in the Notification section of Autotask entities. It lets you send notification emails to recipients whose email is not stored in Autotask, because they are neither a customer contact nor an internal resource. On some forms, there are multiple Other Email(s) fields to allow you to distinguish between To:, CC:, and BCC: recipients. Enter the full email address for each recipient. Separate multiple email addresses with a semicolon. |
- When you have finished personalizing the email message content, click Finish Publishing.
The email is sent to the selected recipients.
NOTE Changes made on the Publish page are not saved back to the organization's quote settings.
- If you selected Publish Manually or Publish Manually and Request Approval, the default system notification template will be used, and you will not have the option to select a different one. You can edit the email message directly, and add and remove recipients as needed before you click Send.
When you publish a quote, the following happens:
- A customer-facing view of the quote is created, based on a quote template. This view is available in HTML and PDF formats. The published version will hide internal information such as the profit margins that are displayed on the Quote page.
- An email is sent to the selected recipients. Depending on the selected quote template and quote email message, the email can contain a link to view the HTML version, an attached PDF version of the quote, or both.
- The publication date, time and publisher are tracked with the quote. The publication data is available in the Is Published, Last Publish Date, and Last Published By fields. These fields can be accessed in widgets, tables, templates, Workflow Rules, LiveReports, Data Warehouse, and the Autotask API.
When the customer receives the quote...
All types of quotes
When the email message is delivered, your customer can click the link to view the quote online, or print it. If a PDF is attached, the customer can download the file. The quote link stays active until the specified Expiration Date of the quote.
The customer cannot edit the quote. Only you, or another resource with security level permission to edit the opportunity associated with the quote, can edit the quote. Refer to Adding or editing a quote item and Adding or editing an Autotask quote.
TIP If you are editing a quote the customer is currently viewing, click Save and tell the customer to click the Refresh icon at the top of the quote to update the quote view.
Quotes for which you requested electronic approval
If you selected the "Request Approval" option, the client can approve or decline the quote electronically. 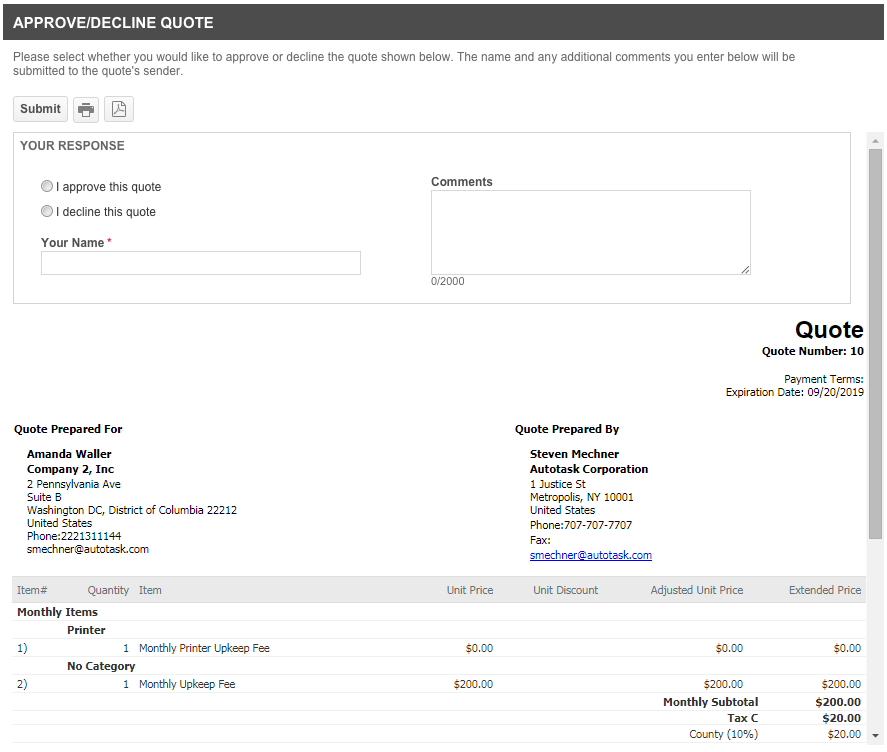
If the client fills out the Comments field on the Approve/Decline Quote page, that text is used to create a note on the associated opportunity, with a PDF of the quote added as an attachment below.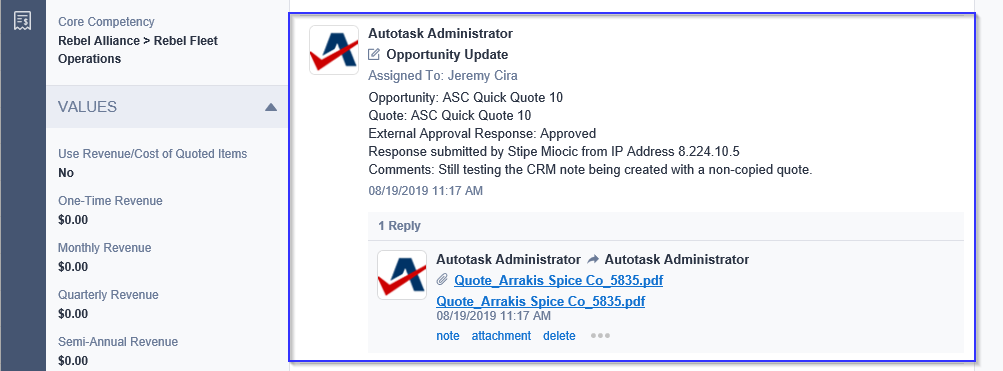
NOTE You must select Show System Notes on the opportunity to which the quote is associated for client comments to appear as a note.
Viewing electronically approved or declined quotes
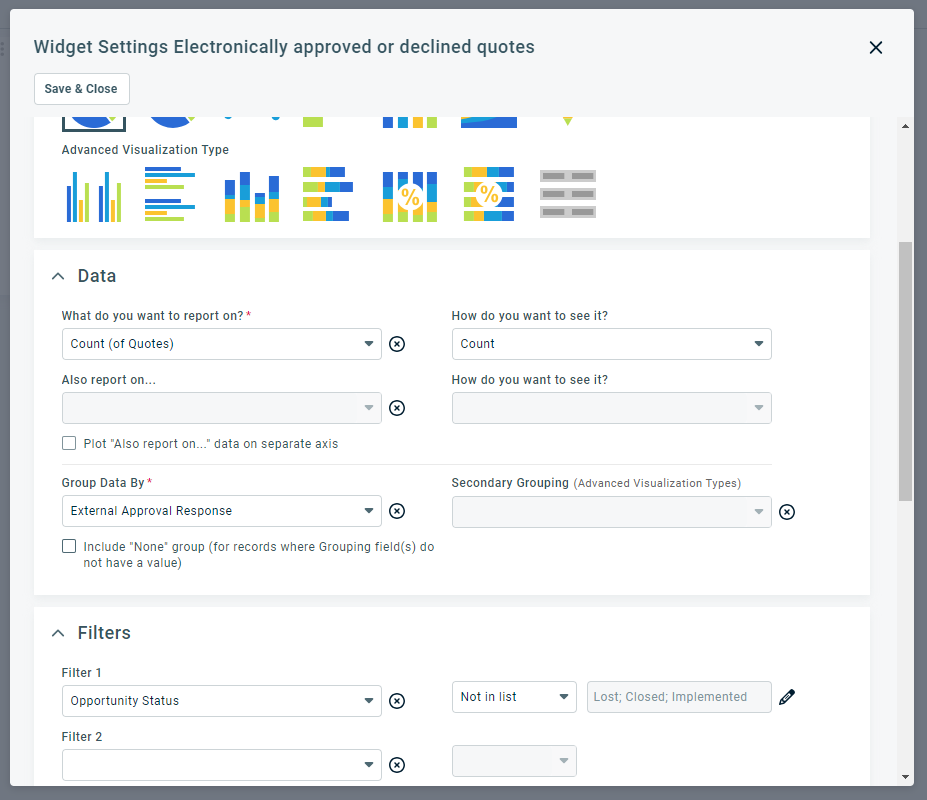
To surface quotes that have been electronically approved or declined, it is best to create a dashboard widget along the following lines:
- Start with a new widget
- Entity: Quotes
- Widget Type: Chart
- Widget Name/Label: Electronically approved or declined quotes
- Visualization Type: Pie
- Report on: Count (of Quotes)
- Group Data By: External Approval Response. Optionally, select Include "None" group to show quotes where you are still waiting for approval.
- Filter 1: Opportunity Status > Not in List > Lost, Closed, Implemented.
Use the widget to update the opportunity and quote status.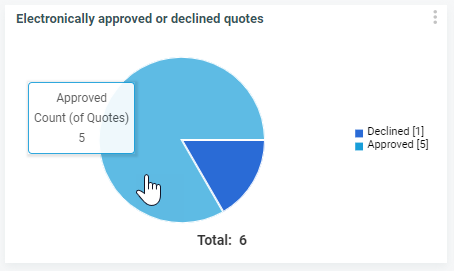
If you do not want to create a widget, you can use the search filters on the Quote Search page.
- Click Choose Filters and select the External Approval Response filter.
- Open the column chooser and select all External Approval fields.


