Creating an SSL Certificate device
PERMISSIONS Security level with access to CRM, permission to view organizations of the same type, and object permissions to add devices
NAVIGATION Create > CRM > Device
NAVIGATION Left Navigation Menu > CRM > Search > Organizations > click Search > click an organization name > accessory tabs > Devices > New
NAVIGATION Left Navigation Menu > Contracts > Contract > Search > View Contract > Contract Detail > Devices > New
IMPORTANT Automated retrieval of WHOIS information, DNS records, and SSL certificates requires that the Domain & SSL Tracking feature is enabled. Refer to Enabling domain & SSL certificate tracking.
In addition to creating an SSL certificate when you create the domain, you can also create the certificate manually.
Populating SSL Certificate-specific fields
For general information about creating a device, refer to Adding and editing devices. Populate the category-specific fields as follows:
- To open the page, use the path(s) in the Security and navigation section above.
- Select SSL Certificate as the Device Category.
The SSL Source component and field will appear on the Main panel of the New Device page.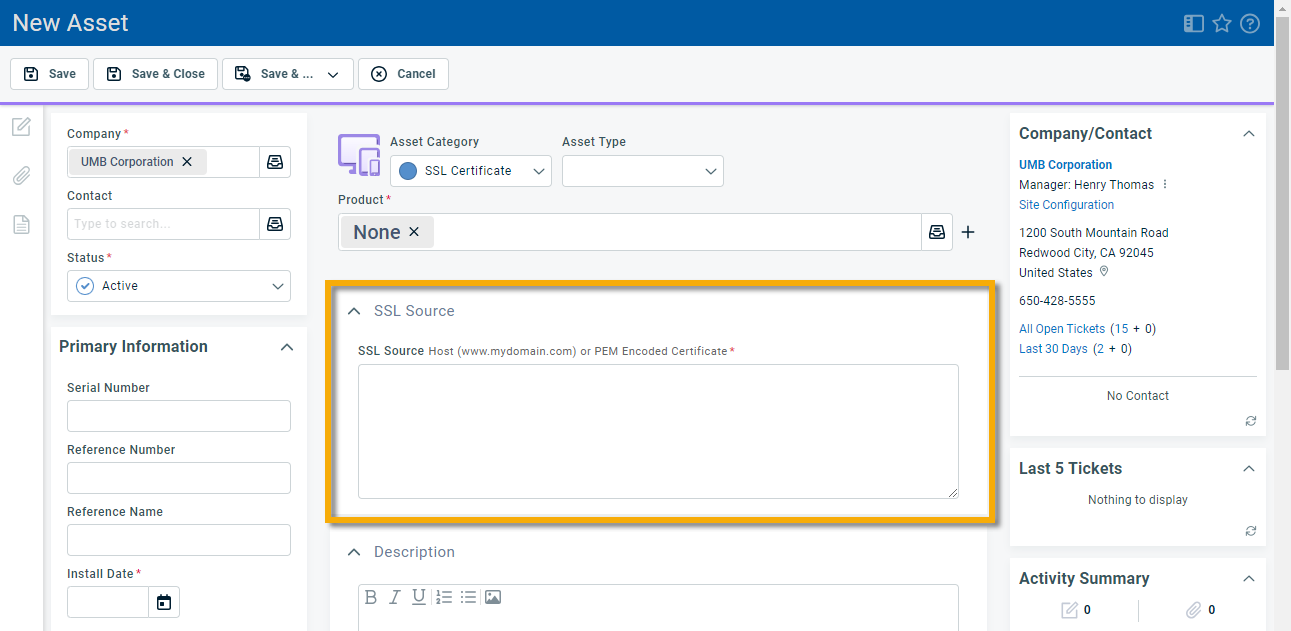
- The required Product field will default to the system product None but can be changed. Best practice is to create a product named SSL Certificate and assign it as the default product for SSL certificate devices. Refer to Adding, editing, or copying a product.
- Complete all required fields and enter an SSL Source.
| Field Name | Description |
|---|---|
|
SSL Source |
Enter a PEM Encoded Certificate. If automatic retrieval is enabled, you can optionally also enter a certificate Host. EXAMPLE for Certificate Host(s) with valid formatting: For PEM certificates, the -----BEGIN CERTIFICATE----- and -----END CERTIFICATE----- lines are required. EXAMPLE for PEM-encoded certificate: NOTE PEM Encoded SSL certificates will not auto-update. |
- Click Save.
- If validation fails, the device will not be saved, and an error message will appear above the toolbar.

-
 Reasons validation can fail
Cause Error Message Invalid entry such as \datto.com
Please double-check your input and try again (Invalid URI Format)
Invalid entry such as htps:\\datto.com
Please double check your input and try again (HttpWebRequest error)
Source does not exist: lalala.com SSL Certificate not found. Please check spelling and try again. No value for Certificate Authority returned
Unable to retrieve SSL Details
PEM Certificate could not be validated due to invalid format, or more than one SSL certificate was returned.
Unable to process PEM-encoded certificate. Please double-check certificate and try again.
If validation is successful, the SSL Details fields will be populated. If you entered a certificate host, the information will be retrieved, if you entered a PEM certificate, it will be decoded locally.
Viewing SSL Details
If the SSL certificate is valid and you are able to save the device, an additional component, SSL Details, will appear. By default, it is displayed below the Description component.
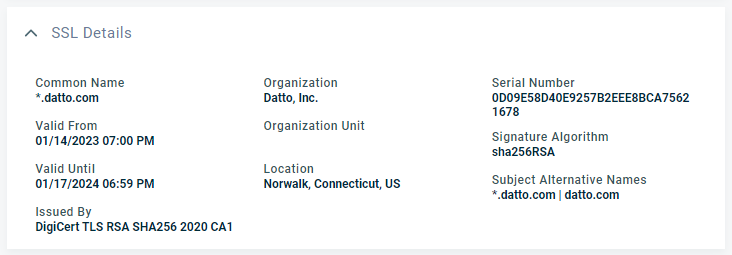
The following view-only fields appear in both View and Edit mode:
| Field Name | Description |
|---|---|
| Common Name | The Common Name (CN) represents the server name protected by the SSL certificate. It can be a single host name (example: datto.com) or a wildcard name (example: *.datto.com). If the certificate is installed on a subdomain, for example the api subdomain, the common name would be api.datto.com. |
| Valid From | The earliest time and date on which the certificate is valid. |
| Valid Until | The time and date past which the certificate is no longer valid. |
| Issued By | The Certificate Authority that issued the SSL certificate, verified the information, and signed the certificate. Example: DigiCert SHA2 Secure Server CA. |
| Organization | The organization that owns the domain for which the SSL certificate was issued. Example: Datto, Inc. |
| Organizational Unit | The department or division of the organization that has requested the SSL certificate. Example: IT |
| Location | The city where the organization is located. Example: Norwalk, Connecticut, US. |
| Serial Number | Used to uniquely identify the certificate within a Certificate Authority's systems. In particular this is used to track revocation information. |
| Signature Algorithm | The algorithm used to sign the public key certificate. Example: sha256RSA. |
| Subject Alternative Names | Any additional domains for which the SSL certificate is valid, separated by the pipe character. Example: *.datto.com | datto.com. |
Updating SSL certification details
IMPORTANT Once the Domain or SSL Certificate category has been selected for a device, you cannot change the category in either the UI or the API.
IMPORTANT Autotask is not updating the certificate or domain itself. It is updating our audit of the certificate or domain information.
Update schedule
Autotask will check and update domains and non-PEM SSL certificates on a schedule that increases in frequency as you get closer to the expiration date:
-
> 90 days: update every 30 days
-
> 30 days: update every 7 days
-
> 7 days: update every 48 hours
-
≤ 7 days: update every 24 hours
NOTE When a domain crosses into a new auto‑update threshold (for example, from more than 30 days remaining to fewer than 30 days), the new schedule does not take effect immediately. The current update interval must complete its next scheduled check before the system switches to the new frequency.
This schedule is updated whenever the expiration date or time is updated, either by using the Update Domain Details feature, or when a user manually updates the expiration details.
Behavior when domains are activated or inactivated
For active domains and non-PEM SSL certificates, auto-updates will run even if they are expired. The following rules apply for inactivating and activating domains and non-PEM CI certificates:
-
If a non-PEM SSL certificate or domain device is inactivated or created as inactive, existing auto-updating jobs will be deleted, and no new ones will be created. However, you can still attempt to make manual updates.
-
If an inactive non-PEM SSL certificate or domain device is activated, auto-updating jobs will be created on the schedule above.
No auto-updating jobs are ever created for PEM certificates.
-
If the WHOIS details were successfully retrieved but the DNS records were not, another auto-updating job is scheduled one hour later.
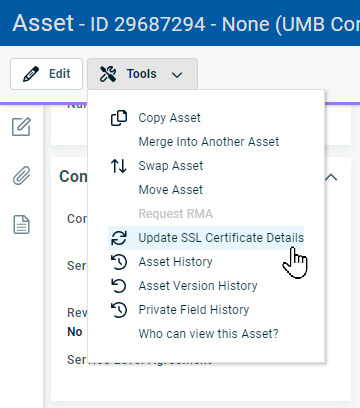
If you have made changes to a domain or SSL certificate, you may want to confirm that the changes have been picked up. Rather than waiting for the next scheduled update, you can initiate an update from either the Tools menu on the Device page, or the context menu of Device tables.
-
Select Update Domain Details or Update SSL Certificate Details to trigger a forced check.
If you are editing a domain, you can select Save & Update Domain Detail or Save & Check for SSL Certificate.
-
A confirmation message will let you know that the domain or the certificate were updated. Click OK.
-
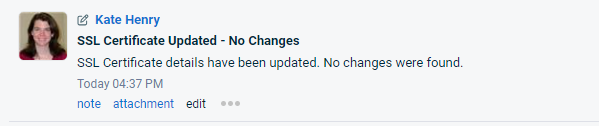
The page will be refreshed, and a note is added to the Activity feed, even if there are no changes.
If there were any changes to the domain or certificate, a new RAW file is added. See below.
When an SSL certificate is checked and/or updated, a read-only system note in RAW format is added with the details from the update.
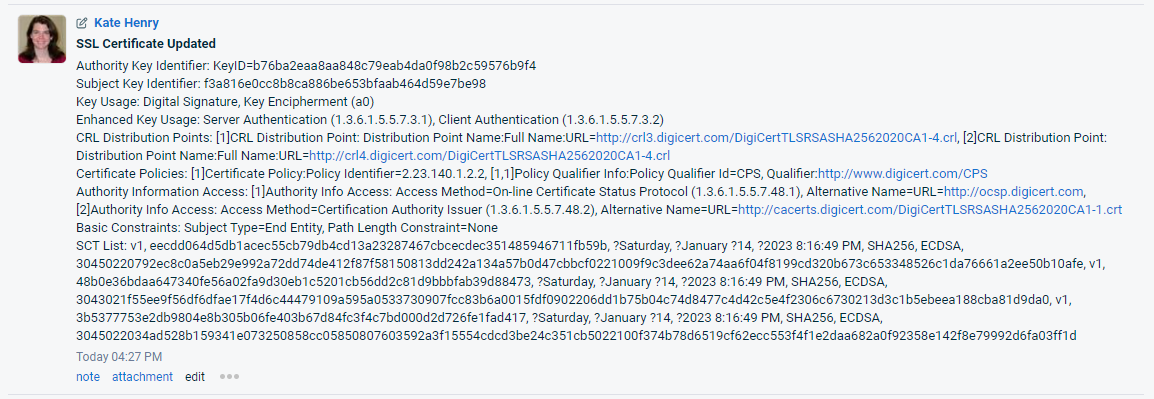
If the SSL certificate details did not change, a note will let you know that the SSL certificate was updated, but no changes were found.


